To see if there are any additional parameters associated with that file format that you might want to customize, you can open the Output Parameters menu and choose the particular format from one of three category submenus -- and a dialog box appears that allows you to customize the output for that format.
The following table lists the format menus, their options and the specific dialog boxes that appear when a particular format is chosen. Click the dialog box name to learn more about the options in that dialog box.
The following is a complete guide to specific output parameter dialog boxes and their options. All of the parameter dialog boxes listed above are detailed in the following section.
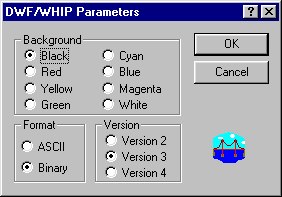
| OPTIONS | DESCRIPTION |
| Background | To change the background color of the source image for use in the final output, click the radio button to the left of the desired color. |
| Format | To change the basic format of AutoCAD output files, click the radio button by the desired option. |
| Version | Click the button by the version of AutoCAD used to render the source drawing. |
| OK | Click OK to apply the new settings. They will remain in effect until you change them again. |
| Cancel | Click this button to close this dialog box without applying any changes. |
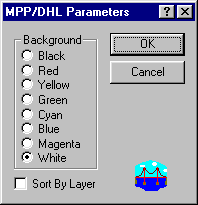
| OPTIONS | DESCRIPTION |
| Background | To change the background color of the source image for use in the final output, click the radio button to the left of the desired color. |
| Sort by Layer | If you want this option active (???), click the checkbox to enter a checkmark. |
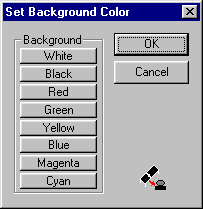
| OPTIONS | DESCRIPTION |
| Background | Click the button that represents your preference of background color in the final output file. |
| OK | Click OK to apply the new settings. They will remain in effect until you change them again. |
| Cancel | Click this button to close this dialog box without applying any changes. |
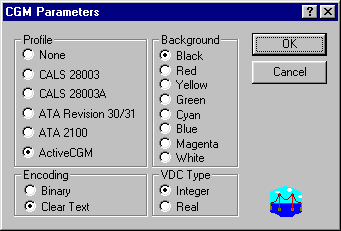
| OPTIONS | DESCRIPTION |
| Profile | Some organizations that use CGM have defined CGM variants called profiles. These profiles say which CGM elements can be used, the encodings and the VDC types allowed. We support five profiles: two for MIL SPEC 28003 (also known as CALS), two for the Air Transport Association (ATA) and ActiveCGM. ActiveCGM is designed for use on the World Wide Web. Users can also request no profile. |
| Background | CGM allows the graphic picture to be drawn on any color background. However we only allow black or white. |
| Encoding | There are three methods used to encode or store the data in a CGM file: binary, clear text and character. Binary is the most compact, while clear text is totally human-readable, and hence the least compact. Binary is the default for all of the profiles. |
| VDC Type | The VDC Type defines whether integers or real numbers are used in the input file. Integer is the default for all of the profiles. |
| OK | Click OK to apply the new settings. They will remain in effect until you change them again. |
| Cancel | Click this button to close this dialog box without applying any changes. |
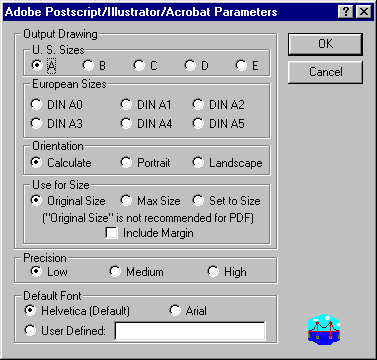
| OPTIONS | DESCRIPTION |
| Output Drawing/ US Sizes |
If the output file will be printed on a printer using American page sizes, click the appropriate button in this collection of options. |
| Output Drawing/ European Sizes |
Description |
| Output Drawing/ Orientation |
Description |
| Output Drawing/ Use for size |
Description |
| Precision | Description |
| Default Font | Description |
| OK | Click OK to apply the new settings. They will remain in effect until you change them again. |
| Cancel | Click this button to close this dialog box without applying any changes. |
| OPTIONS | DESCRIPTION |
| Output Mode | This option defines whether the data is stored as 3-D (model space) or 2-D (draw space) elements. If 2-D is used all of the elements are placed inside a Drawing (404) element. |
| Version | This option determines the version of the IGES specification that the file conforms to. In actual practice the only difference is the added Global Section parameter in Version 5.0 and above files. The version number changes for files created for one of the earlier versions but the actual files conform to the IGES Version 3.0 specification. This is due to the fact that the IGES specification did not change in a manner that materially affects the output generated by this program. |
| OK | Click OK to apply the new settings. They will remain in effect until you change them again. |
| Cancel | Click this button to close this dialog box without applying any changes. |
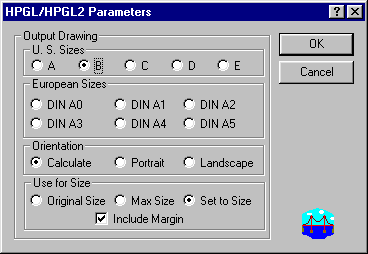
| OPTIONS | DESCRIPTION |
| Output Drawing/ U.S. Sizes |
Click the radio button to the left of the preferred size -- if you are converting an image to a file that will be printed on American page sizes. |
| Output Drawing/ U.S. Sizes |
Click the radio button to the left of the preferred size -- if you are converting an image to a file that will be printed on European page sizes. |
| Output Drawing/ U.S. Sizes |
Click the radio button to the left of the preferred orientation for this image. |
| Output Drawing/ Use for Size |
Not at all sure what the options represent. |
| OK | Click OK to apply the new settings. They will remain in effect until you change them again. |
| Cancel | Click this button to close this dialog box without applying any changes. |
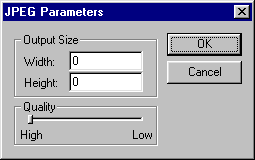
| OPTIONS | DESCRIPTION |
| Output Size | Click in both Width and Height fields and type the exact external dimensions of this output file. |
| Quality | Click and drag the slider (which is set to "High" by default) to your preferred quality setting. |
| OK | Click OK to apply the new settings. They will remain in effect until you change them again. |
| Cancel | Click this button to close this dialog box without applying any changes. |
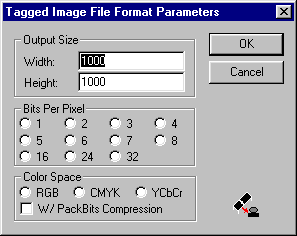
| OPTIONS | DESCRIPTION |
| Output Size | Click in both Width and Height fields and type the exact external dimensions (measured in WHAT?) of this output file. |
| Bits per Pixel | Click the radio button by the active bit-depth option you want to apply to this output image. As this dialog box is applied to a large number of raster formats, please note that the available bit-depth values may vary depending on the format you want to apply to the source image. |
| Color Space | Text to come... not a clue as to what some of these options mean. |
| OK | Click OK to apply the new settings. They will remain in effect until you change them again. |
| Cancel | Click this button to close this dialog box without applying any changes. |
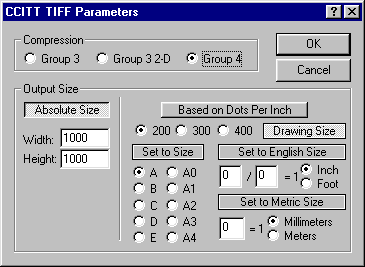
| OPTIONS | DESCRIPTION |
| Compression | Click the button by the compression algorithm you want to apply to this image. |
| Output Size/ Absolute Size |
If you want to use this option (which is active by default) simply click in both Width and Height fields and type the exact external dimensions (measured in WHAT?) of this output file. |
| Output Size/ Based on DPI... |
If you want to use this option, click Based on Dots Per Inch, then click any combination of the other options (???) to enter your preferences. |
| OK | Click OK to apply the new settings. They will remain in effect until you change them again. |
| Cancel | Click this button to close this dialog box without applying any changes. |
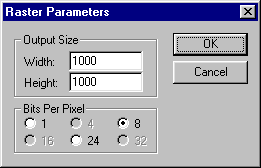
| OPTIONS | DESCRIPTION |
| Output Size | Click in both Width and Height fields and type the exact external dimensions of this output file. |
| Bits per Pixel | Click the radio button by the active bit-depth option you want to apply to this output image. As this dialog box is applied to a large number of raster formats, please note that the available bit-depth values may vary depending on the format you want to apply to the source image. |
| OK | Click OK to apply the new settings. They will remain in effect until you change them again. |
| Cancel | Click this button to close this dialog box without applying any changes. |
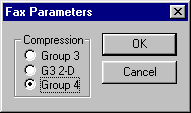
| OPTIONS | DESCRIPTION |
| Compression | Click the radio button to the left of the compression algorithm of your choice. Group 3 provides ... G3-2D provides ... Group 4 provides ... |
| OK | Click OK to apply the new settings. They will remain in effect until you change them again. |
| Cancel | Click this button to close this dialog box without applying any changes. |
ED: 11.21.00 | Contents © 2000, Tailor Made Software, Ltd.